
Now, six years later, the kids are in school and I find myself with a little time on my hands. I occasionally have the opportunity to work on some projects that have been on the back burner. I honestly think I’d be too embarrassed to show you this before photo, if it wasn’t for how much I love the after results!

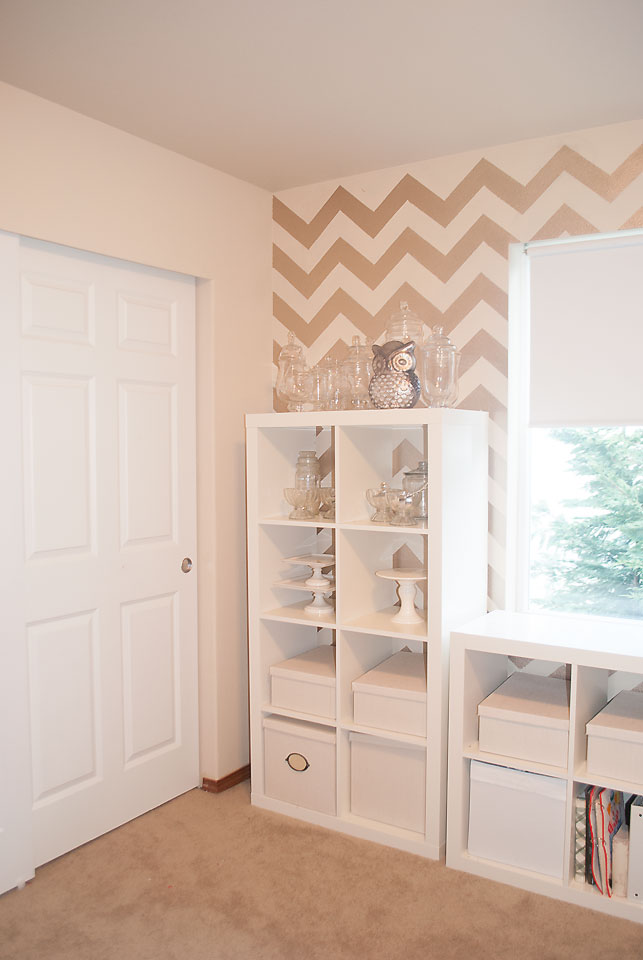
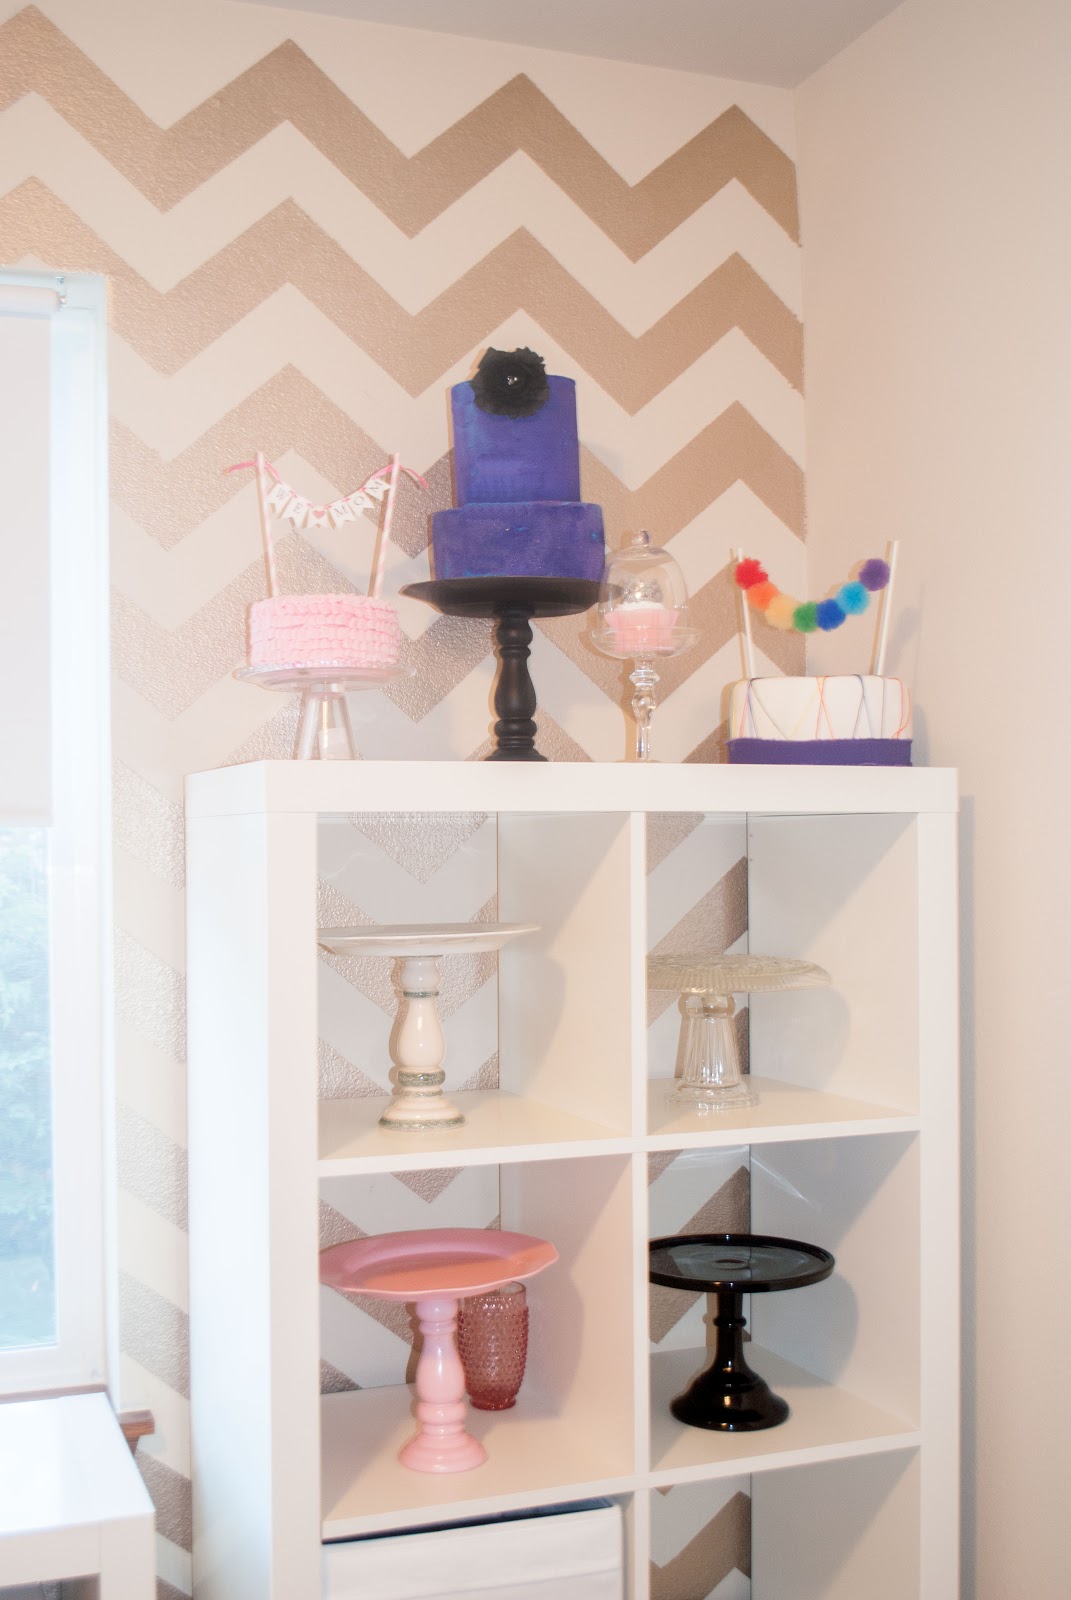
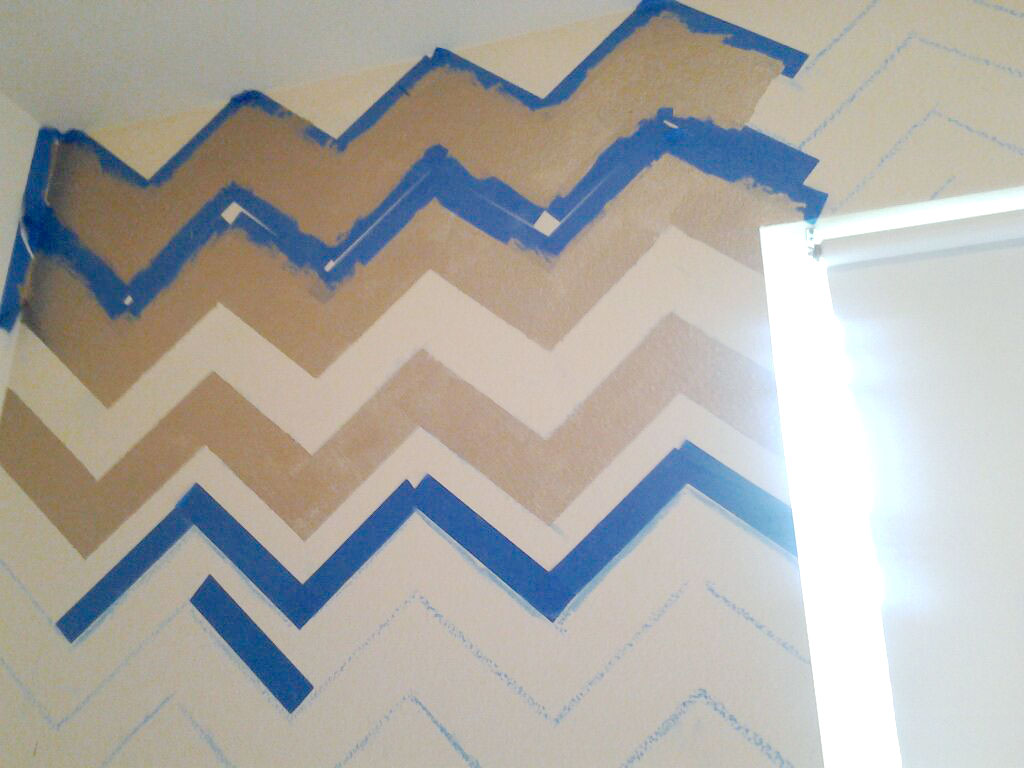
Isn’t it dreamy?!…I still have some details to work out (hanging art, etc.) but I love the look so far. I started by choosing a wall stencil because I knew I wanted the room it to be unique that really reflected me. I love patterns and lately chevron has been cropping up in many of my designs. So after hours scouring Pinterest for ideas, I took a leap and chose a chevron stencil.
I originally had in mind the chevron wall would be aqua (one of my favorite colors), but after some sample paint trials and a few trips to Home Depot, I fell in love with this Vintage Gold and I’ve never been so pleased with a color choice. Lets face it – gold is the perfect warm & versatile neutral! And gold works with pretty pastels – aqua, peaches and pinks as well as jewel tones – so all of my favorites! I can simply change my accessories and have an entire new look.

I knew I wanted white furniture. That was a must have! I even tried to convince my husband to paint existing furniture white.. but he hates painting! So as a birthday gift to myself I took a little shopping trip to Ikea and picked up three bookcases, and plenty storage boxes to contain my chaos!

 |
This makeover took much too long. Life always seems to get in the way, so from start to finish this process took about 6 months. From choosing & testing paint, furniture shopping & assemble and all the little details in between I am just glad to have a functioning room! There are always little hang ups that you have to get through. |


Bookshelfs:
Shelving unit, white
$89.00


Ikea – KVARNVIK
Box with lid, white

Martha Stewart – Vintage Gold


So overall, I spent under $500. and that includes all the new furniture. If you have more time I’m sure one could find some fabulous thrift store finds that could get the effect for even less. And while there are still more things I’d like to change in my craft room, I am loving what we have done so far! It is so nice to walk into the room and think how great it looks instead of feeling instantly overwhelmed with the chaos. (By the way.. did anyone notice my awesome boom box on my desk! ha!) Hope this gives you some ideas for creating your own perfect space! I think I may start referring to this space as “my studio” instead of as a craft room.. it just seems like so much more now!


Christy ..I love this ..AWESOME !!! I so have to share !!
http://www.moodyliciouschildrensspa.com
Looks GREAT! Totally jealous!!!
Thank you Ladies!
I bet that’s your favorite room in the house now. Its amazing how just a bit of paint, decorations and organization can make a room so inviting and conducive to creativity. I see a lot of great new ideas coming from ItsyBelle this year.
So pretty and clean! Love IKEA!
Oh sweet goodness! That room is lovely. If I weren’t moving out of this house in 5 months, I’d rip off your room and make one of my own. Seriously, it looks so bright and serene! In awe!
haha! Thank you!
My husband and I are talking about redoing the office that we share and will continue to share. My half craft room and other his office. Have spent weeks looking for bookshelves – no ikea near us. Love your before and after and hope my after looks like yours. Beautiful.
The gold paint was a perfect choice. Can you do mine too? Great inspiration and thanks for giving the rest of hope.